Introduction
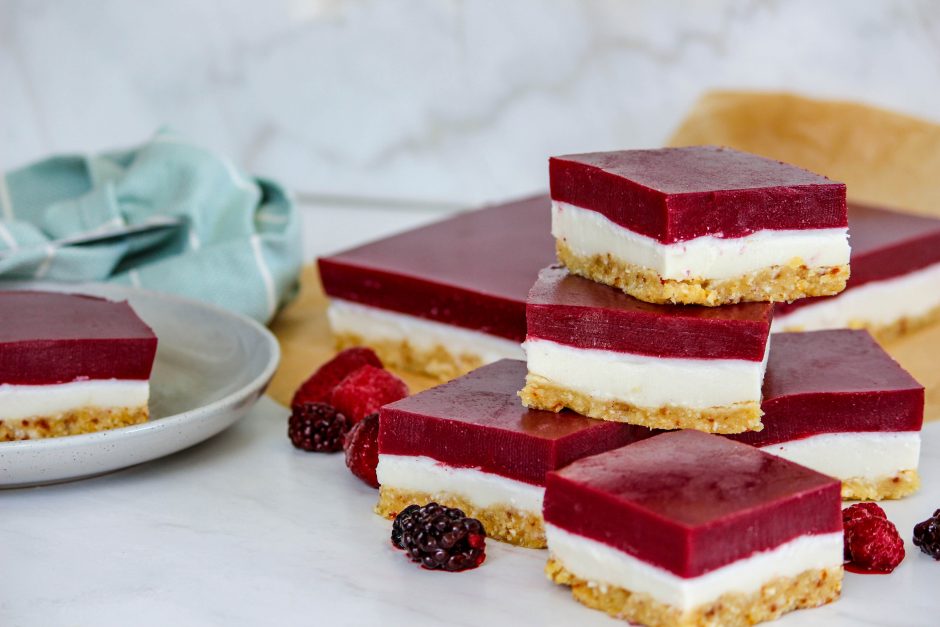
Jelly slice is a sweet, tasty and refreshing dessert that consists of biscuit base, creamy filling and jelly. This no-bake cake is ideal for entertaining, afternoon tea, or an iced snack during the hotter months. Jelly slice is simple to make and tastes great for both adults and children.
Ingredients Needed
For a traditional jelly slice You will need: plain sweet biscuits, butter, sweetened condensed milk, lemon juice, gelatin and a packet of jelly in your favorite flavor. All these make a perfect symmetry of taste and texture.
Preparing the Base
Start by greasing and lining a rectangular baking tray with baking paper. Crush the plain biscuits until they resemble fine crumbs by either using a food processor or by placing in a sealable bag and bashing with a rolling pin. Crumb layer The crumbs should be small enough to create a solid base.
In a small saucepan or in the microwave, melt butter. Transfer biscuit crumbs to a mixing bowl, add the melted butter and mix to combine the two. Press it down well with the back of the spoon and make it level. Refrigerate tray to set, meanwhile make filling.
Creating the Creamy Filling
In another bowl whisk together the sweetened condensed milk and lemon juice. The milk will slightly coagulate from the lemon juice and make it a thicker and creamier mixture. In a small pot, add the gelatin in a small amount of hot water, stirring until dissolved. Let it cool a bit before adding it to the condensed milk.
Mix to combine and blend the gelatin through the filling. Spread the creamy mixture onto the chilled biscuit base evenly using a spatula. Replace the tray into the fridge to allow the filling to firm up, approx. 1 hour.
Preparing the Jelly Topping
Make up the jelly with slightly less water than the packet suggests, so you get a firm set. Cool the jelly till room temperature (not completely set), and pour it over the creamy layer.
Pour the cooled jelly carefully over the set filling to form an even layer. Place tray back into the fridge and let the jelly slice set, this should take a couple of hours as a minimum, but it is best to let it set overnight.
Serving Suggestions
When set, remove the jelly slice from the tray lifting it out by the baking paper. Cut into squares or rectangles using a sharp knife that has been dipped in hot water and wiped dry between each cut.
It is best cold, the texture is just right and the flavor deeply refreshing. This jelly slice is great to add to your dessert platter or for a cool treat on a hot day.
Nutritional Insights
Jelly slice is a treat, so it’s best in moderation. The desert is a source of carbohydrates through the base biscuit sugar from jelly and condensed milk. For people who want to make it with less sugar however, they can and have used sugar free jello singles and reduced sugar graham crackers.
Variations and Alternatives
To change them up use a variety of flavoured jelly packets to suit your taste. Some fresh fruits like berries or kiwi can be placed in between the creamy layer and jelly, to provide natural sweetness and different texture.
To mimic the flavors of the tropics, substitute some condensed milk with coconut milk and a mango-flavored jelly for a fruity accent.
Storage Tips
Left-over jelly slice keeps well in an air-tight container in the refrigerator, for up to five days. Keep the slices separated so that they stay pretty and not stuck together.
Conclusion
Jelly slice is a straightforward and pleasant dessert that is appealing with its layers in both appearance and taste. It’s this easy for everyone to make this classic treat and enjoy some refreshing delight. Be it in a party, or as a snack, jelly slice is definitely something that will never fail to impress.
It’s so versatile and the preparation is so easy that it is usually a dessert that I go back to for most occasions such a joy in every bite!